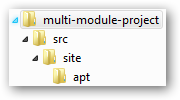
First generate the top level project using the maven-archetype-site-simple archetype using the following command,
mvn archetype:create
 -DgroupId=[Java:the project's group id]
 -DartifactId=[Java:the project's artifact id]
 -DarchetypeArtifactId=maven-archetype-site-simple
this will generate a Maven project with the following directory structure.
The project that is generated is the minimum project setup to generate site documentation. The index.apt file is the main index page for the site, and is written in the Almost Plain Text format, which is a wiki like format. You can also generate a more complete site project using the maven-archetype-site archetype like this,
mvn archetype:create
 -DgroupId=[Java:the project's group id]
 -DartifactId=[Java:the project's artifact id]
 -DarchetypeArtifactId=maven-archetype-site
this will generate the following project structure.
After you have generated the site project, edit the pom.xml created from the site archetype plugin. Make sure the the packaging type is set to “pom” like the following.
2 |
<modelversion>4.0.0modelversion> |
3 |
<groupid>com.pillartechnologygroupid> |
4 |
<artifactid>sampleProjectartifactid> |
5 |
<version>1.0-SNAPSHOTversion> |
6 |
<packaging>pompackaging> |
By setting the packaging type to “pom”, any projects you generate from the root of the project directory will insert itself into the project by creating an entry into the modules section of the pom.xml for the site. In the root directory of your project that you created above, type in the following command,
mvn archetype:create
 -DgroupId=[Java:the module's group id]
 -DartifactId=[Java:the module's artifact id]
if you now edit the pom.xml for the main project, you should see an entry towards the bottom of the file like the following.
3 |
<module>sampleModulemodule> |


